Effortless LLM Deployment with Zeblok SDK and Ai-MicroCloud
Deploy Large Language Models as APIs using Zeblok Ai-MicroCloud’s Ai-API managed service and Zeblok SDK. Discover how to seamlessly serve LLMs without the burden of managing complex infrastructure.

This is Part 2 of Exploring the Zeblok-SDK series. Checkout Part 1 here.
Part 1 introduced the Zeblok SDK along with the available Ai-MicroCloud managed services, demonstrating how enterprise developers can seamlessly develop, deploy, and scale their ML workflows using the Zeblok Ai-MicroCloud. In this blog, we will explore how developers can serve a Large Language Model (LLM) as an API through Ai-MicroCloud’s Ai-API managed service.
Outline
Scenario
Serve LLM via Ai-API using SDK
Querying LLM via Postman
Conclusion
Scenario
LLMs are a hot topic these days, and many enterprise users, including Technical Managers, AI Engineers, Software Engineers, and Machine Learning Engineers, are seeking a convenient yet reliable way to deploy LLMs. For example, if an enterprise developer wants to deploy and serve a trained LLM for real-time querying by users and decides to expose the model as an API, they could choose to serve the model directly through a cloud provider. This approach involves navigating the complexities of selecting the appropriate managed services and managing reliability, scalability, security, networking, and other challenges. Alternatively, the developer could leverage Ai-MicroCloud’s Ai-API service, deploying the model with the Zeblok SDK through a few simple function calls, all without the need to manage any infrastructure complexities.
Serve LLM via Ai-API using SDK
In this demo, the publicly available pre-trained LLM, facebook/opt-125m (facebook/opt-125m · Hugging Face ), will be served using the vLLM library to create and expose the LLM as an API endpoint. The demonstration will be showcased on a Linux-based Ai-Workstation instance, though the same process can be performed from a local environment or machine.
Spawn the Ai-Workstation instance
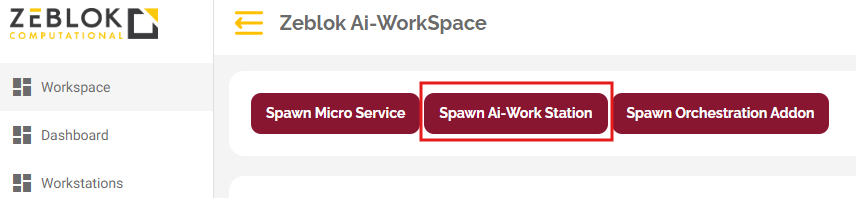
Navigate to the Ai-MicroCloud and click on
Spawn Ai-Workstationunder the Workspace tab.
Complete the required fields in each section

Select the
Minimal NotebookandWS-demo-vllmplan for the Ai-Workstation instance.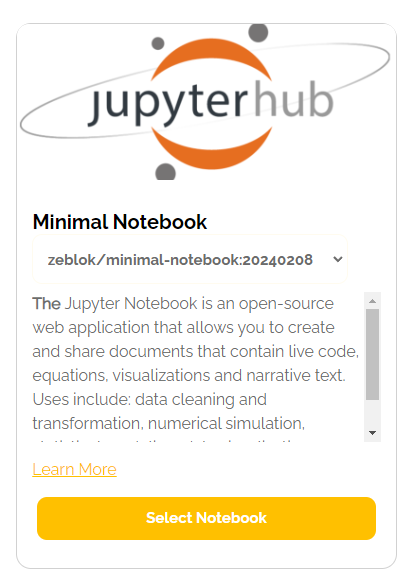

Choose a namespace and attach a bucket to the Ai-Workstation instance.
Assign a meaningful name to the Ai-Workstation instance and click
Create Workstation.


The LLM Deployment Demo Ai-Workstation instance has been successfully spawned.

Download the LLM Locally
Users can either specify instructions to download the LLM in the Dockerfile, allowing it to be downloaded on-the-fly during deployment, or they can download the LLM locally, which is the recommended approach for serving an LLM. In this article, the LLM will be downloaded and stored locally, and the model filepath will be specified in the vLLM entrypoint script.
Open the Ai-Workstation instance by clicking on the arrow as shown below:

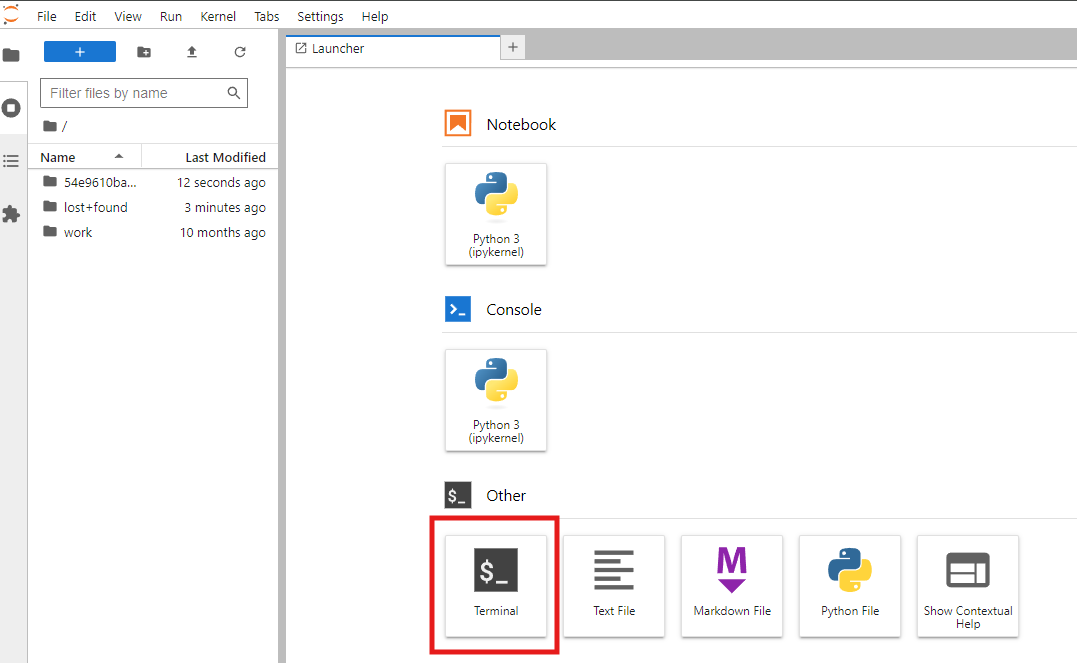
In the JupyterLab interface, select the Terminal option as shown below:

Install Git by running the following commands in the terminal
sudo apt-get update sudo apt -y install git

Verify the Git installation
git --version # Output: git version 2.34.1
Create a folder named
llm_deployment_exampleand download the facebook/opt-125m LLM into this folder.mkdir llm_deployment_example cd llm_deployment_example git lfs install git clone <https://huggingface.co/facebook/opt-125m>
The folder structure for the facebook/opt-125m LLM will appear as follows:
ls -a opt-125m


API Service using vLLM
The vLLM library offers convenient, production-ready scripts for deploying and exposing LLMs as an API. For this demonstration, we’ll use the readily available Dev API Server code (vllm/entrypoints/api_server.py) without delving deeply into the vLLM library. The Dev API Server code is accessible here, and readers can explore the vLLM library further by visiting its official GitHub repository.
The vLLM Dev API Server can be tested via the Terminal on the Ai-Workstation instance as follows:
pip install -U vllm
python3 -m vllm.entrypoints.api_server --model ./opt-125m --port 2600
Prepare the Dockerfile
Till now, we’ve downloaded the LLM in the local storage and successfully tested the vLLM’s Dev API Server. We will now prepare the Dockerfile to be passed to the Ai-API service.
We will build on top of the ubuntu:22.04 base image and update the image
FROM ubuntu:22.04
RUN apt update && apt upgrade -y
We will install the latest version of python3-pip and vLLM library , and copy all the contents in llm_deployment_example folder into the image home directory.
RUN apt -y install python3-pip wget curl
RUN pip install -U vllm
COPY ./ ./
Finally, we’ll give the command to be executed when running a container from an image
CMD ["python3", "-m", "vllm.entrypoints.api_server", "--model", "./opt-125m", "--port", "2600"]
The final Dockerfile in llm_deployment_example folder looks like follows:
FROM ubuntu:22.04
RUN apt update && apt upgrade -y
RUN apt -y install python3-pip
RUN pip install -U vllm
COPY ./ ./
CMD ["python3", "-m", "vllm.entrypoints.api_server", "--model", "./opt-125m", "--port", "2600"]
Create a Dockerfile in the llm_deployment_example folder and paste the content above into it.
Experience the Zeblok Ai-MicroCloud with a 21-day free trial! Sign up at zeblok/playground
Utilize SDK to Create & Spawn an Ai-API Deployment
The llm_deployment_example folder structure look as follows:

We will use the Zeblok SDK PyPI to create and deploy the AI-API.
Log into the Ai-MicroCloud and generate the API Access Key and Access Secret. Obtain the Datalake Access Key and Secret from the Admin.

Open the Ai-Workstation instance created earlier, launch a new terminal, and install the Zeblok SDK.
pip install zeblok-sdk

Create a Notebook with the following steps: click on the + symbol and then click on Notebook

Create API Auth and DataLake objects.
from zeblok.auth import APIAuth
from zeblok.datalake import DataLake

APP_URL=f'<your-base-url>'
API_ACCESS_KEY='<your-api-access-key-from-Web-UI>'
API_ACCESS_SECRET='<your-api-access-secret-from-Web-UI>'
DATALAKE_ACCESS_KEY ="<azure-account-name-from-your-UI>/<aws-access-key-id-from-your-UI>/<minio-access-key-id-from-your-UI>"
DATALAKE_SECRET_KEY ="<azure-account-key-from-your-UI>/<aws-secret-access-key-from-your-UI>/<minio-secret-access-key-from-your-UI>"
BUCKET_NAME="<your-bucket-name>"

api_auth = APIAuth(
    app_url=APP_URL,
    api_access_key=API_ACCESS_KEY,
    api_access_secret=API_ACCESS_SECRET
)

dataset_auth = DataLake(
    api_auth=api_auth,
    access_key=DATALAKE_ACCESS_KEY,
    secret_key=DATALAKE_SECRET_KEY,
    bucket_name=BUCKET_NAME
)
Paste the above code in the first cell, replace the respective keys, secrets, and bucket name accordingly, and run the cell.
List all available plans and identify a suitable plan with the plan types Ai-API and CAAS for the respective Ai-API and Containerization services.
from zeblok.plan import Plan

plan_obj = Plan(api_auth=api_auth)
plan_obj.get_all(print_stdout=True)
Paste the above code in the second cell and run the cell.
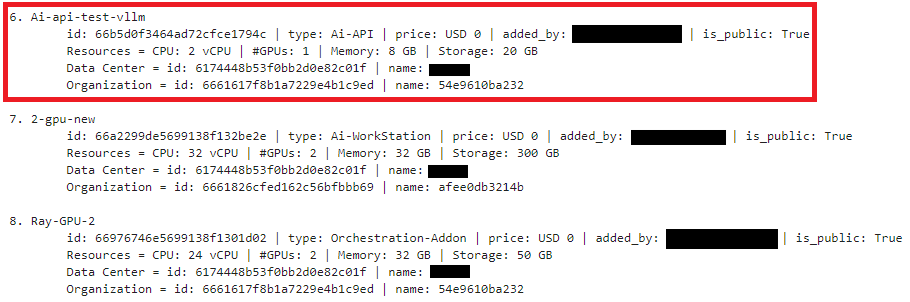
We’ll choose plan ids 66b5d0f3464ad72cfce1794c and 66616f4249646697062dad9c for the respective Ai-API and Containerization service.


List all namespaces and select a suitable namespace for deploying the Ai-API.
from zeblok.namespace import Namespace

namespace_obj = Namespace(api_auth=api_auth)
namespace_obj.get_all(print_stdout=True)
Paste the above code in the third cell and run the cell.

We’ll choose namespace id: 66837d69740e05f528fdf74e
Create and deploy the Ai-API using the SDK.
from zeblok.api import API

AI_API_PLAN_ID = "66b5d0f3464ad72cfce1794c"
CAAS_PLAN_ID = "66616f4249646697062dad9c"
MODEL_FOLDER_PATH = "llm_deployment_example"
NAMESPACE_ID = "66837d69740e05f528fdf74e"

ai_api_obj = API(api_auth=api_auth, datalake=dataset_auth)

ai_api_output = ai_api_obj.create_and_spawn(
    model_folder_path=MODEL_FOLDER_PATH, ai_api_plan_id=AI_API_PLAN_ID, ai_api_type='llm',
    caas_plan_id=CAAS_PLAN_ID, namespace_id=NAMESPACE_ID, ai_api_name='SDK Demo AutoDeploy'
)

print(ai_api_output)
Paste the provided code into the fourth cell and execute it. Users will see the following result in the Notebook after running the code:

Wait for the Containerization service to complete.
The Containerization service will begin executing, and users will receive an email notification after each intermediate step is successfully completed.


Once the Containerization service finishes, the status will change from executing to ready.
This is the final step in the LLM deployment.
After the Containerization service completes, Ai-API service will automatically start deploying the LLM.

The deployment of the facebook/opt-125m LLM will take approximately 12 minutes. Once the deployment is complete, the status of the respective Ai-API deployment will change from deploying to deployed.


Querying LLM via Postman
The facebook/opt-125m LLM has been successfully deployed and exposed publicly as an API using the Ai-API managed service. Users can now query the API to generate relevant results. The Postman tool will be used to query the facebook/opt-125m model.
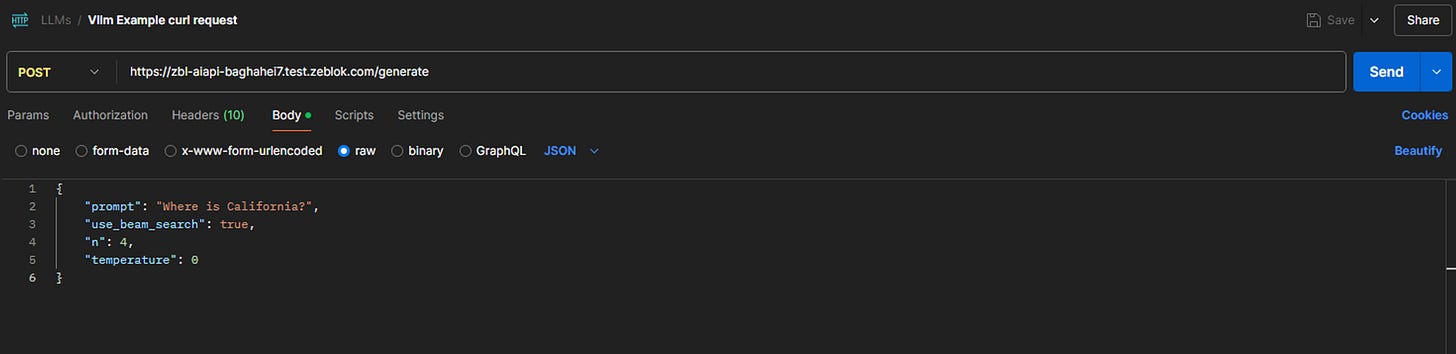
The vLLM Dev API Server creates a generate endpoint for querying the LLM. Copy the External EndPoint link of the Ai-API deployment, append /generate to the end, and paste it into the Postman request URL input box.

Users can add a body to the LLM request by entering the desired prompt.
{
    "prompt": "Where is California?",
    "use_beam_search": true,
    "n": 4,
    "temperature": 0
}
The final request in Postman will appear as follows:
After clicking "Send," users will receive a response as shown below:


Conclusion
The second part of the "Exploring the Zeblok-SDK Series" demonstrated how users can leverage the Zeblok SDK to deploy and expose an LLM as an API through Ai-MicroCloud’s Ai-API managed service. The upcoming articles in this series will explore additional real-world examples of different Ai-MicroCloud managed services and how users can effectively integrate the Ai-MicroCloud and Zeblok SDK into their daily AI and ML workflows.